
Have you been bitten by the travel photography bug? Are you outgrowing the Auto or Program mode on your DSLR camera, and want more creative control over your images? There’s absolutely nothing wrong with shooting in Auto mode, but as you start to gain more confidence as a photographer, you will want to take your images to the next level. Getting off auto mode will help you gain more creative control over your images. You don’t have to leap in to full manual mode right away – there are two semi-manual modes on your camera that you may find easier to start with before making the change to full manual mode.
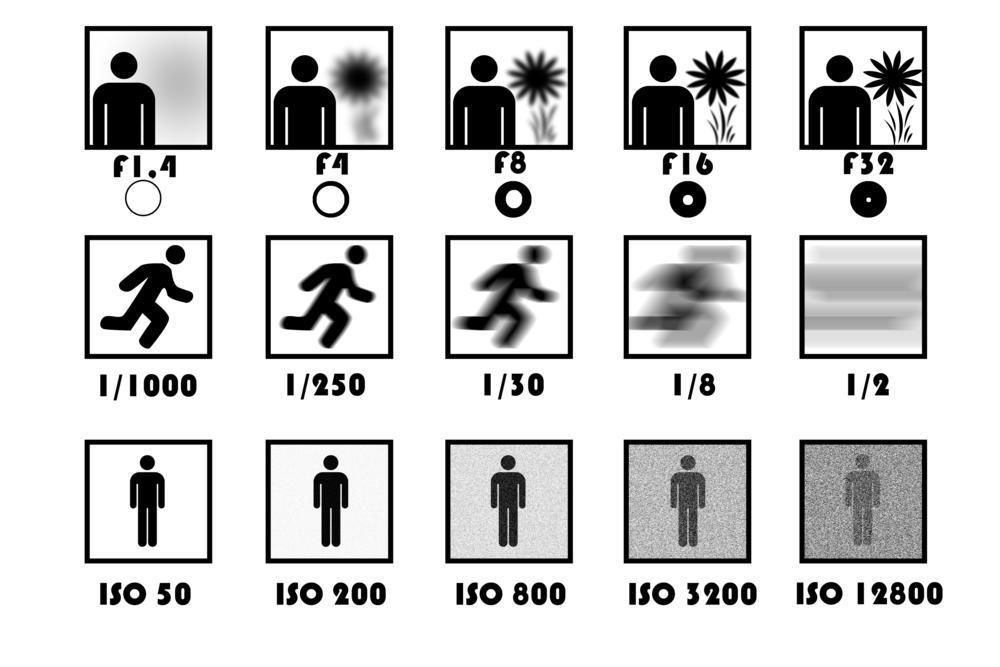
To fully master manual mode on your camera, you will need to learn about ‘the exposure triangle’, and how ISO, shutter speed and aperture all combine to affect your exposure. That’s a lot of information to learn, so I heartily suggest you find some good tutorials on the internet to explain exactly how to put all this information into practice.
In the meantime, let’s look at using the semi-manual modes on your camera.
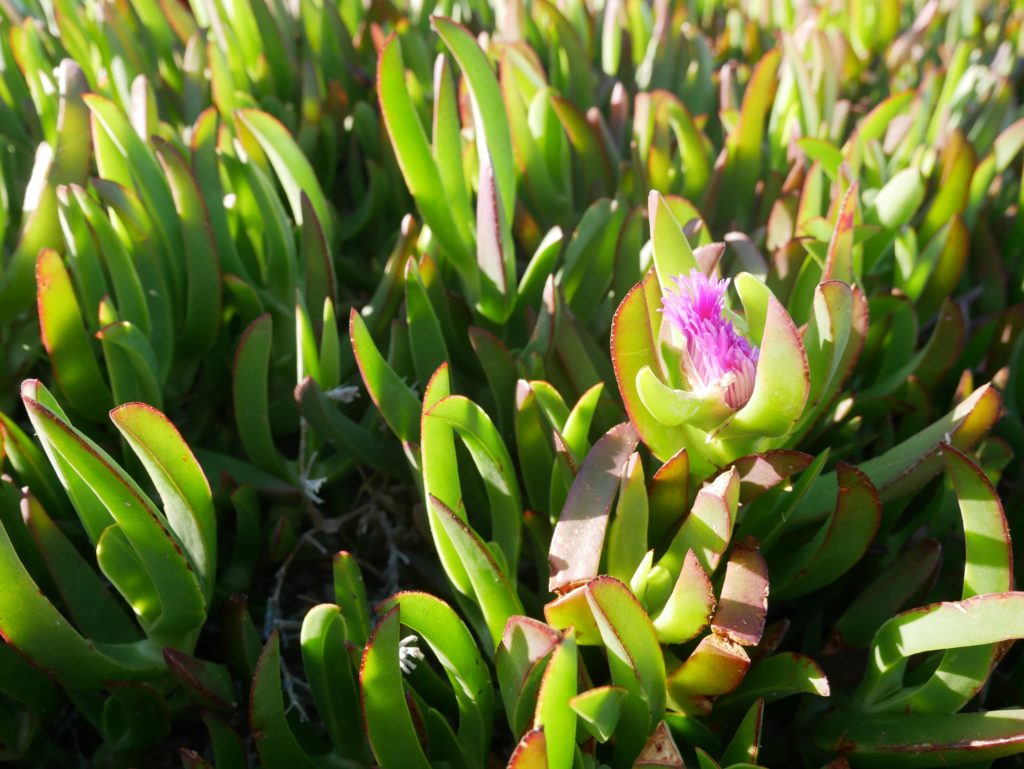
The flower is sharp while the background are slightly blurred. The F-number is 5 (Photo by Max Therry)
Aperture Priority
Aperture Priority mode is the A on the Nikon mode dial, and Av on Canon’s. This mode has you in control of ISO and aperture. The camera will choose a shutter speed according to your choices to give correct exposure. For instance, if you were shooting at an aperture that lets a lot of light in (low f-stop number such as f/2.4) your shutter speed may be into the hundreds on a bright day. If you chose a small aperture (high f-stop number) such as f/22, your shutter speed may drop to under 1/60th second.
When to Use Aperture Priority
Aperture priority is a good choice for when you want to choose your depth of field (DoF). A shallow DoF is achieved using a low f-number between f/1.8 to f/5.6. This will give you a sharp subject and foreground, and a pleasantly blurred background. Portraits and any photo that you want a blurred background for are created using a shallow DoF.
Landscapes, street scenes or shots where you want maximum detail and sharpness from front to back need a wide DoF. This is achieved by setting your aperture between f/11 to f/32.
If you want a wide depth of field, you will probably need a tripod to hold your camera steady, as the shutter speed may well drop below where you can hand-hold it without camera shake blurring the image. With Aperture priority, you can’t choose your shutter speed, which can be a drawback.
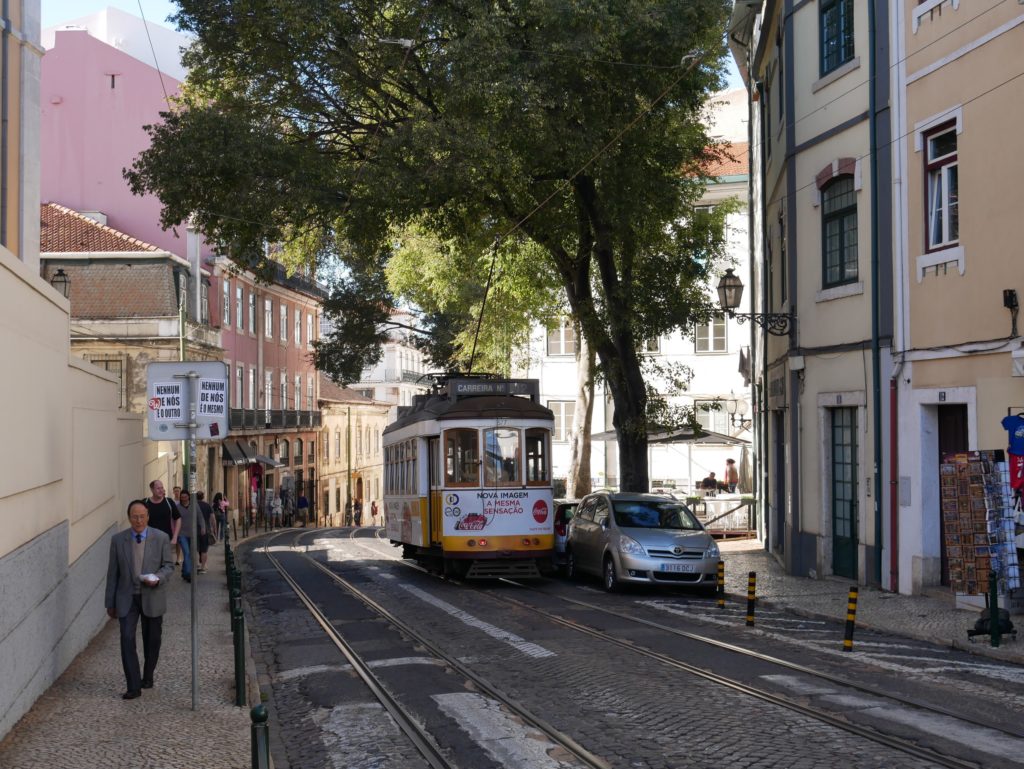
The moving objects (train, people) on this photo are sharp because of fast shutter speed. Shutter speed is 1/200 (Photo by Max Therry)
Shutter Priority
Shutter Priority mode is S on the Nikon dial, and Tv on Canon. This mode puts you in control of the ISO and shutter speed, and lets the camera decide on the aperture to give correct exposure.
If you decide to shoot at a shutter speed of 1/125th of a second, the camera will likely choose a larger aperture (smaller f-number) to let more light in, particularly if you are shooting in a dim light. The opposite holds true for lower shutter speeds. The drawback to this mode means you have no control over the depth of field in your images.
When to Use Shutter Priority
This mode is great for controlling motion. If you want to freeze motion, or make a blurry, long-exposure shot, this is the mode to use. To shoot sports or action, such as a parade or festival, choose a fast shutter speed of at least 1/250th second, and preferably more if you have plenty of light.
If you want to slow motion down, such as capturing light trails on city streets, or making flowing water look soft and silky, choose a slow shutter speed of around 2-5 seconds or more.
ISO
In both of these Aperture priority and Shutter priority, you are still controlling the ISO as well. ISO is simply a measurement of how sensitive your sensor is to light, and you can change it. 50 or 100 ISO is the lowest setting, and is generally a default value to use in these modes if the day is bright or you are using flash or studio lighting.
If you go into shade or overcast, you may need to turn your ISO up to between 200-400. For shooting indoors, or in dimly lit areas, you may need to go up to 800 ISO or more.
(Photo by Max Therry)
Each camera has different capabilities when it comes to ISO. Some don’t perform great at high ISO’s and produce bad image quality, and some are very good. The photo below shows noise and imperfections.
Get to know your camera before your trip, or your results may be disappointing (Photo by Max Therry)
It’s better to test your own camera’s limitations before you go traveling.
Camera Settings for Travel Photography
Here are a few bits of advice to use for travel photography, both general and specific:
General
- White balance: this is the way your camera records white tones, and you may have noticed that under certain lights (such as tungsten or fluorescent) you will get a color cast on your images. Auto white balance is usually OK, but for more accuracy choose one of the available white balance choices if you know what type of light you are shooting in.
- Lens choice: As you are traveling, you need a lightweight but sturdy lens. You can get some great compact lenses these days, so you don’t need to end up with neck and shoulder ache from hauling heavy lenses around all day.
- Focus: For best results, leave your camera on autofocus, but learn how to focus manually in case your autofocus becomes confused and picks the wrong part of your subject.
- Be respectful: Think about the impact your being there may have on the locals. It’s always better to ask for permission to photograph people (and is a law in some countries), and if they say no, respect their choice. Put yourself in their position – how would you feel about being photographed without being asked first?
Specific Settings
These settings will hopefully give you a starting point for your own experiments in travel photography.
- Landscape: Use Aperture Priority. With landscapes, the choice is usually for front-to-back sharpness, so you need a small aperture, like f/16 or f/22. You will need a tripod to keep your camera still over longer shutter speeds.
- Wildlife: For moving subjects, choose Shutter Priority and pick a larger shutter speed – 1/250th of a second and higher. Let your camera pick the aperture and ISO for these shots.
- Buildings: Ever wonder why your architectural shots look like the straight lines are slanted? This is called ‘converging verticals’, and unless you use a special tilt-shift lens or architectural camera, it’s unavoidable. You can fix this problem in post-processing, by using editing software.
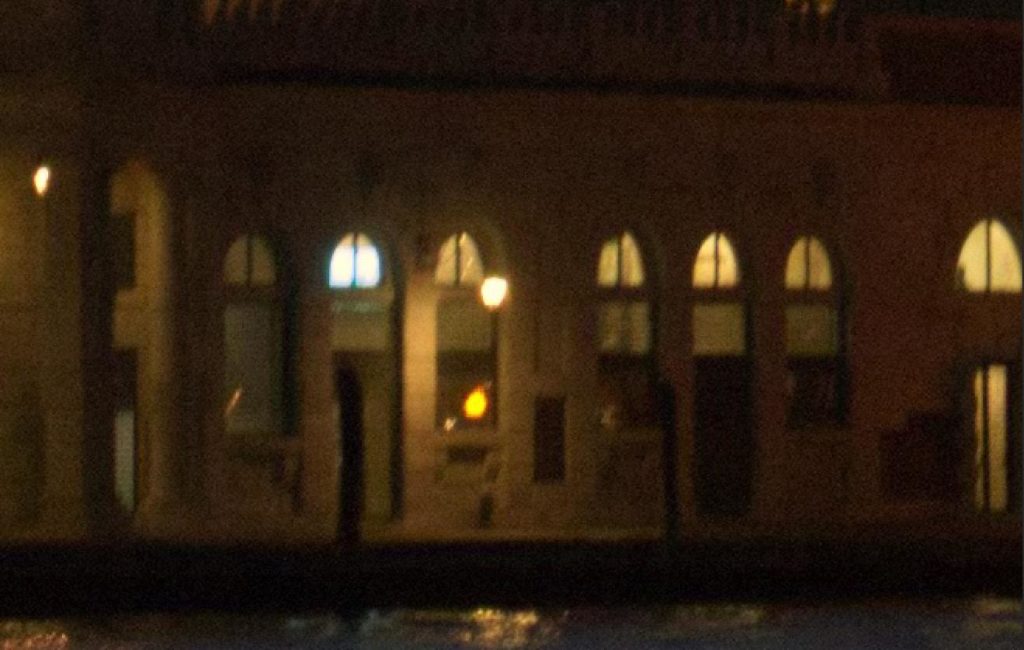
- Food: Unless the food is outside during the day, it will be dim or dark. Don’t be tempted to use your flash – it will make the dish look terrible. Raise your ISO, or even use your phone to take the photograph.
One additional thing that can help you to improve your photo is switching your photo format from JPEG to Raw. Raw files take more space in your storage, but they also collect much more information about your image, which will allow you to fix more issues and improve your photos in post processing. To open Raw file you’ll need to use a photo editing program which has a Raw converter – for example, Lightroom, Luminar, Capture One (and others) can do it, Photoshop needs an additional plugin in order to do it.
Here is an example of adjusting an exposure of Raw (on the left) and Jpeg (on the right) file:
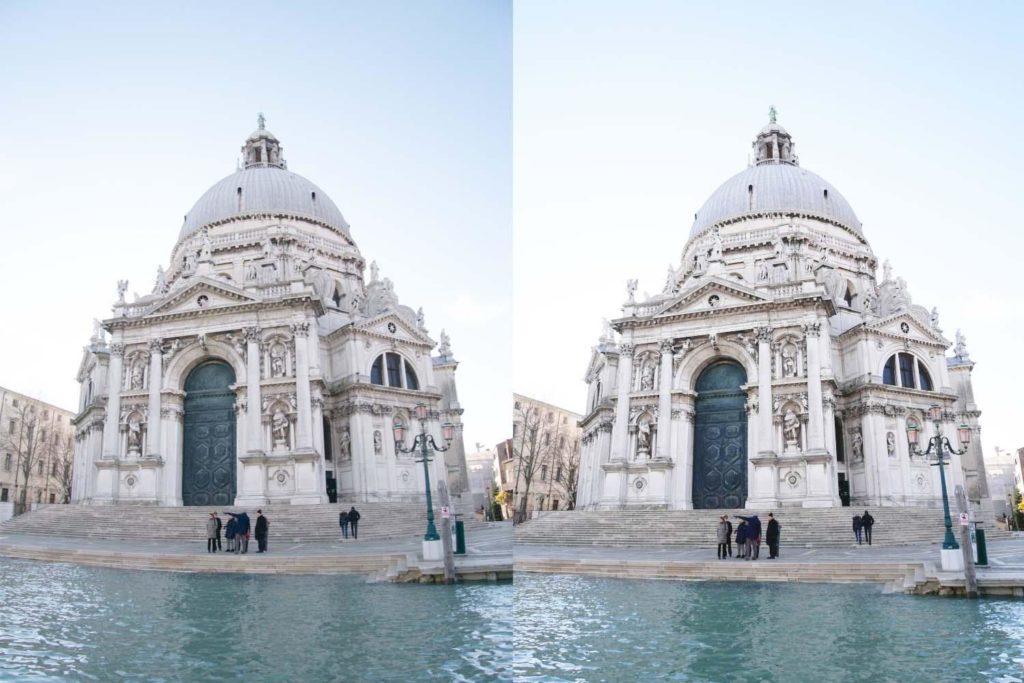
Rising the exposure on the Jpeg file can create white spots, while Raw photo seems more natural (Photo by Max Therry)
Final Thoughts on Getting Off Auto Mode
If you are not comfortable with leaving Auto mode, then don’t – it’s not worth missing the shot because you can’t change the settings fast enough. Don’t let anyone tell you that proper photographers only shoot in manual – I know many professionals who don’t always use manual mode.
However, if you do make the leap to getting off auto mode by using the semi-manual modes and take the time to learn about exposure, metering, and all the other things, you’ll soon find yourself getting more adventurous in your images, and experimenting with your creativity. Above all, don’t forget to practice, practice, and practice some more.
For More:
- On our site: 5 Travel Apps to Install on Your Phone
- On our site: Creating Great Food Photos for Instagram
-All photos by Max Therry.

4 comments
Brilliant! Thank you for sharing your knowledge.
Glad you like the tips, Barb. I too found these tips helpful!
This is so helpful! Thank you.
So glad you found value in the piece, Julie.