
When people travel and visit new places, the first thing they will often look for is the food. Eating local delicacies help travelers gain a better idea of what a country or place is all about. Creating the ideal food photo isn’t just for travelers, though. If you’re active in social media, especially Instagram, no matter what hobby you are in, you always want to create ideal photo. Let’s take a look at creating great food photos for Instagram and your other social media feeds.
The goal in posting food photos is to achieve a photo quality that is similar or better than others out there, and to create your own style of food photos. Some food photos you take may not be at the level that you desire. To create the best photo for your Instagram feed, you can try out some of these these tips. With time and experimentation, you’ll come up and perfect your own style of creating good food photos.
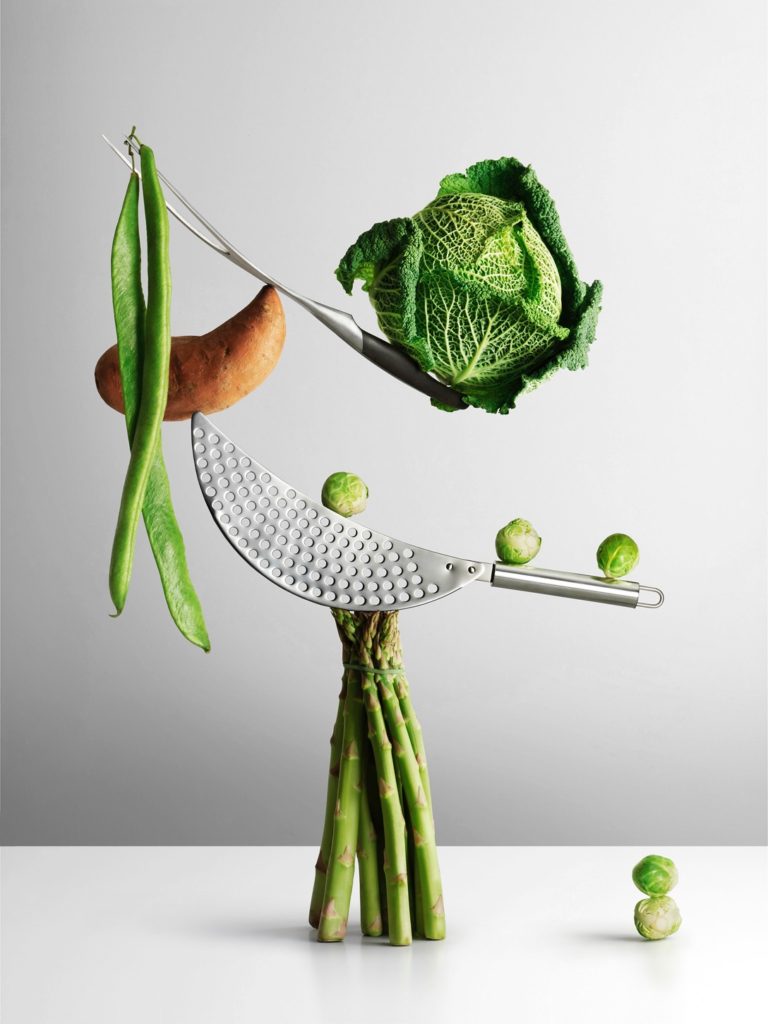
(Photo courtesy Rebecca Van Ommen and Paper Boat Creative)
Get a Steady Shot
One of the biggest challenges you may face when taking photos for your Instagram is the “camera shake.” Having a shaky camera can result in a blurry photo. You can slve this problem with the help of a tripod but, you won’t always have a tripod with you. Whether you’re eating in a restaurant abroad or even your local fast food joint, you won’t always have space to bring a tripod with you.
In order to shoot a stable photo, you will need to find other ways to keep your camera steady. You can stand next to a wall, place your arm on a friend’s shoulder or take a photo with both hands to keep the camera steady. Another option to consider for steady photos is using a monopod or a tripod.
Monopods, or Selfie Sticks
Monopods, popularly known as selfie sticks, are portable devices you can use to easily take landscape pictures or videos. The same goes for tripods. If you want to take a steady selfie with your food, the monopod is a good option.
- Securely attach your smartphone to the clamp of the monopod.
- Depending on the type of stick you purchase, you can use Bluetooth to sync your phone and the stick so that you only have to press a button to take a photo.
- You can adjust the angle of the stick to get a good angle for your food photos.
You can use monopods to keep your camera steady before you take a picture. However, you still need to press a button via Bluetooth or a wired connection. This can still cause camera shake. A slight flick of your wrist can make the shot look unsteady but, the selfie stick is more portable than a tripod.
(Photo courtesy Paper Boat Creative)
Tripods
Tripods are helpful to create steady shots as well where the food is the star. Unlike a monopod, your hands are free from accidentally causing camera shake with a tripod.
- Set up the tripod and attach the smartphone to the clip attachment.
- Adjust the settings of your photo for the ideal shot.
- Set your time to give you time to let go of the camera to prevent camera shake.
- Wait for the camera to take the photo.
You can set the timer and let your smartphone’s camera do the rest of the work.
In order to use a tripod for your smartphone, look for a smartphone camera clip attachment for your tripod. The attachment will prevent the camera from slipping from the grip.
Monopods and tripods aren’t the only objects you can use to keep your photos steady. There are other unconventional ways to get a steady photo. You can also use a stack of books to take photos. The books can act as a base for your smartphone camera so you can avoid camera shake. However, you must be careful when taking your photo. The book can slide off or tumble.
There are many ways to get a steady shot. From your own hands to devices and even books. All these techniques can help you get a steady shot.
Observe the Rule of Thirds for Your Photos to Place Emphasis
The rule of thirds is one way to make your photo look more balanced. Your image is divided into nine boxes equally divided by two horizontal and two vertical lines intersecting. The theory of the rule of thirds states that placing your subject in the intersections of the lines or along the lines will result in a balanced photo and it will make the photo look more natural.
When you’re taking food photos, you want to place an emphasis on the main dish. If you want to shoot a good photo of your food, you want to make sure that the dish is the star of the show.
Concentrate on the dish with the help of the photography grid. The grid helps you balance the photo by dividing your screen into nine equal blocks. Each block creates an equal division over the entire image.
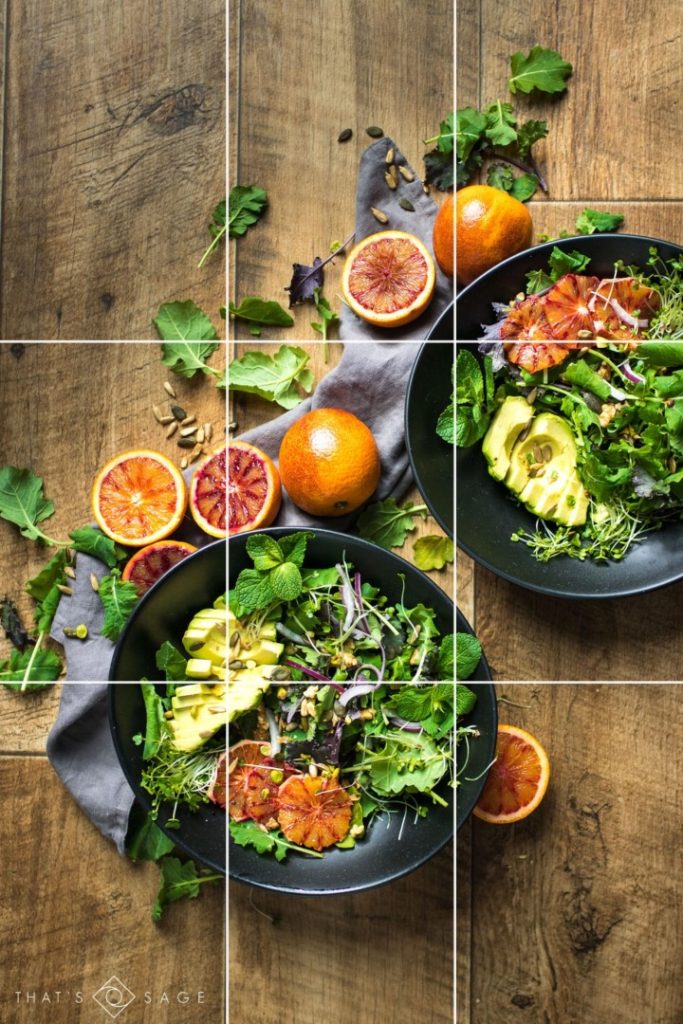
Image courtesy of That’s Sage
The grid will also help your food look better because you’re shooting from angles differently than you would without the grid. Try using the photography grid while shooting photos from the top down. Stand up and shoot photos from a top-down view.
You can place your dish on the lower left box and concentrate on that box while the box on the upper right will have props to enhance the look of your photo.
However, the photography grid does not necessarily have to be followed all the time. The grid is just a guide. You don’t have to follow it every time. Your subject can be on any section of the grid or even on the intersections. This is a great way to experiment with photo cropping.
Using the photography grid should not be taken as gospel but, it is a helpful guide in featuring your main dish.
When you share an image to Instagram, the app still applies the photography grid. Instagram can display portrait and landscape photos.
Shoot Using Natural Light If Possible
Whenever you’re shooting food photos, always look for natural light. This is the light that comes from the sun and will illuminate the food in a way that artificial light simply can’t.
In order to shoot using natural light, take your photo while seated next to a window. Your food arrives and it looks amazing, so you want to share a photo of the food to your Instagram feed. Using natural light will help make the food look even more delicious. Taking a picture with natural light will highlight your food and give it shadows that will make the dish even tastier.
Sometimes, the light can get very strong. You can diffuse the amount of light entering with a white sheet of cloth or paper. If the cloth is white, use the restaurant’s white tablecloth or your dining napkin as a diffuser to decrease the amount of light entering your photo and then take the shot. You’ll notice that the food is no longer over-exposed with light.
Shooting Without Natural Light or Under Low-light Situations
You may also encounter situations when no natural light is available such as a restaurant that is dimly-lit. The light that the establishment provides might not be the most ideal lighting situation for your photo.
One of the best things to do is to ask for help from your friend or someone in the restaurant. Ask them if they can provide their phone’s flashlight as a continuous light source instead of using your camera’s flash.
The camera flash can make your food look unappealing in your Instagram feed. Your friend’s flashlight will do a better job because it does not just disappear after one shot. The flashlight is a continuous source of light and not flicker on and off after you shoot your photo.
(Photo courtesy Paper Boat Creative)
Use Photo Editing Apps
Once you have taken your photo, you can either share your photo to Instagram right away or edit the image a little in order to make the food look even more delicious. The main Instagram app does not give you a lot of freedom to edit photos compared to photo editing apps. You can change settings such as the contrast and sharpness but, the editing you can do is not as intensive as apps dedicated to photo editing.
Improve the look of your food photos with the help of photo editing apps such as Snapseed, VSCO, etc. There are many apps you can find on the Google Play or Apple’s App Store to enhance your image and even use advanced features such as photo retouching.
Photo retouching is critical to making your images look better. You can read up on guides by creative agencies such as the Paper Boat Creative. Paper Boat provides blogs and articles on photo retouching along with providing high-end photo retouching services for our clients. Take note that while the discussions on our website come from the perspective of professional desktop users for our clients, the features mentioned are the same features you will find on mobile, and tips you can incorporate for your own personal photography.
Add Context to Your Photos by Writing Captions
After you edit your photo, the final thing you should do before creating the post is add context to your photo. When you add more details to your photo, you can get more people to look at your photo and share it with other people. Telling a short story can give your photo more life compared to uploading a photo without a description.
- Tell a story by mentioning how you discovered the dish.
- Tag the dining establishment you ate in.
- Mention what you ate and how you discovered the dish.
- You can add a link or directions to the establishment so more people can visit your shop.
Displaying the details will show that you appreciate the restaurant and that you made an effort in creating great food photos. You’re also advertising the restaurant for your followers.
(Photo courtesy Paper Boat Creative)
Use Our Tips for Creating Great Food Photos
These Instagram food photography tips aren’t necessarily the most fun but, they get the job done.
- Keeping your hands steady can already help you take steady shots. But it will also be helpful to learn how to use monopods or tripods in the right circumstances.
- The rule of thirds takes a little bit of learning to fully understand, but getting the hang of it will help you in the long run for photography.
- Look for light sources that will help make your photos look better, even in low-light situations.
- Editing will also come in handy if you want to make the food look even more delicious. And always remember to tell a story. Showing a picture won’t be enough to compel users to share the photo.
When taking photos, consider that creating the ideal “foodstagram” photo takes a little bit of planning and organizing. Whether you are a traveler, a foodie or, just a regular person, these tips can help you in creating great food photos for Instagram—as well as improve your photography skills overall.
For More:
-
Improve your food photography composition in 15 minutes using the rule of thirds
-
On our site: Travel Photography: Getting Off Auto Mode
- On our site: Share Your World: Top Travel Instagrammers Build Community
– All photos courtesy Rebecca Van Ommen and Paper Boat Creative, except as indicated.

2 comments
Very nice blogs!!! I have to learn a lot of information about these sites…Sharing for wonderful information. Thanks for sharing this valuable information with our vision. You have posted a trustworthy blog keep sharing,
product photo retouching services
Thanks so much for your kind words. We appreciate your support!